MENU

Moisture Mapping with the Tramex Meters App

How to create a Moisture Map with the Tramex Meters App

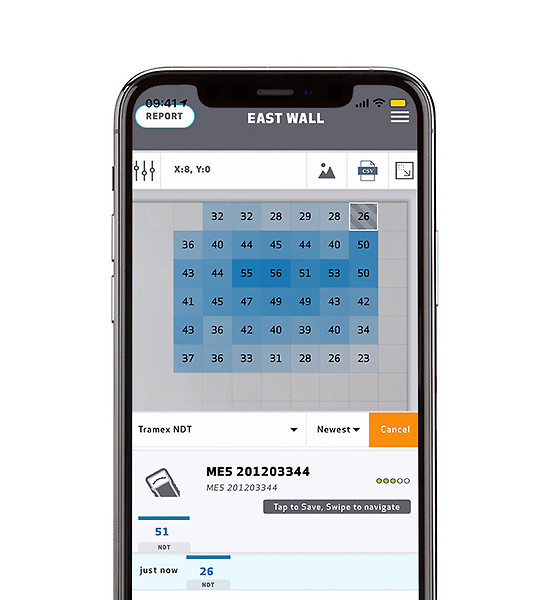
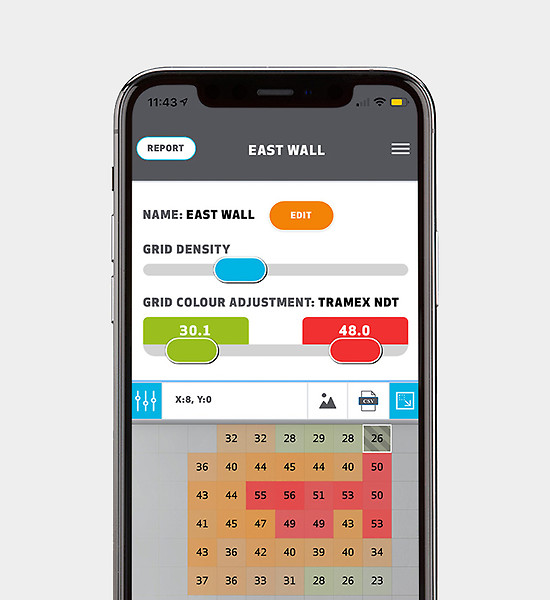
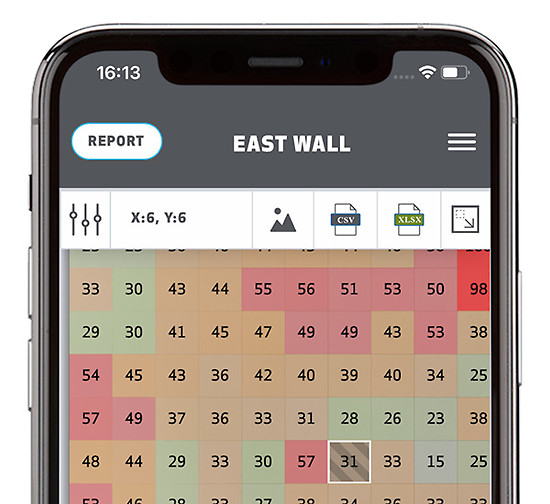
Moisture mapping is very useful in identifying the location and size of an affected area with its corresponding moisture content value.  It allows the user to clearly visualize the water migration and delineate the dry from the wet areas, and the varying degrees of moisture quantity within the wet area. Readings for each segment of the affected locations can be recorded throughout the drying process. Moisture maps can be included in a report, serving as an accessible communication tool between the professional and client. It greatly facilitates communications among trades, insurance companies, adjusters, attorneys and other professionals and also serving as invaluable data in cases involving controversy.

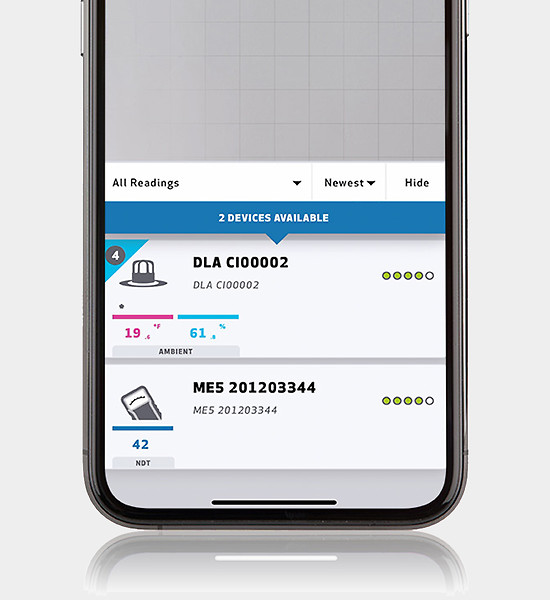
The Moisture Mapping tool can be used with the following Tramex moisture meters:

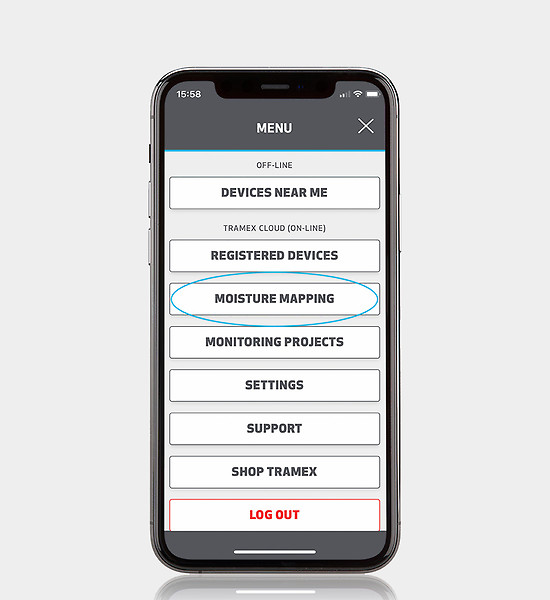
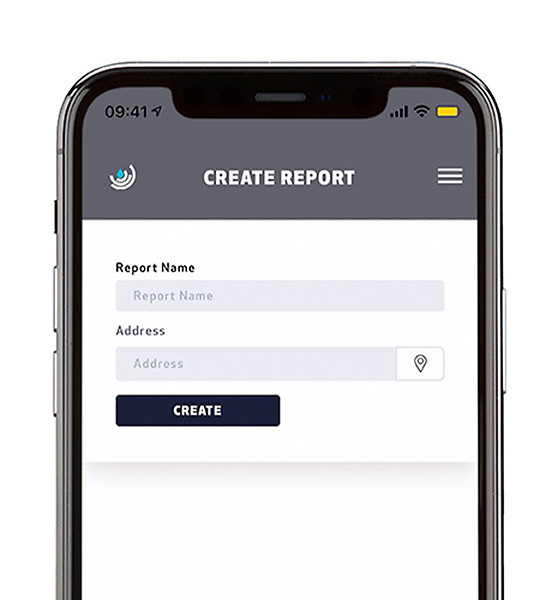
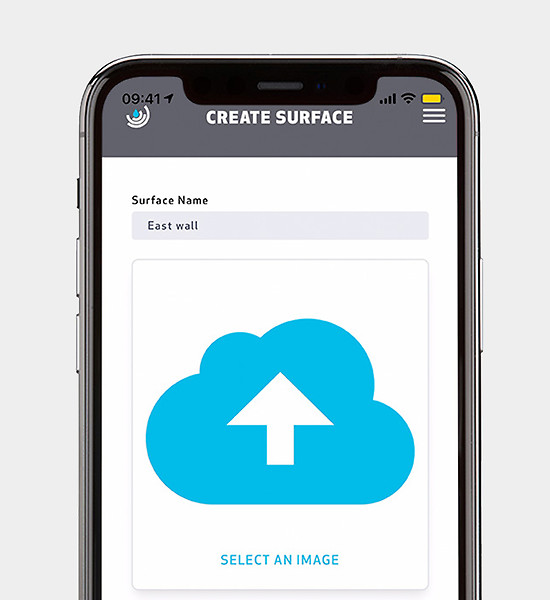
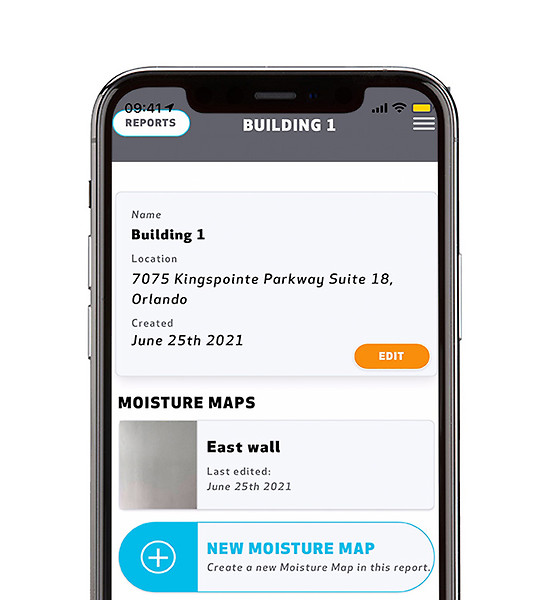
Follow this step-by-step guide to create a Moisture Map with the Tramex Meters App or watch our video.

Moisture Map with the Tramex Meters App

Select Moisture Mapping

Ensure you are online and select ‘Moisture Mapping” from the Menu options.

Screenshot Select Moisture Mapping
Screenshot Create a Report

Create a Report

Reports are a collection of one or more moisture maps, allowing you to group moisture maps of walls, floors, ceilings or flat roofs in one place.

  • Click on 'New moisture report'
  • Enter your report name and location. If you are on-site and you don’t know your address, tap the geotag icon and your location will be found.
  • Click ‘create’ to proceed.

Create a Surface

Click on 'New moisture map' to add the first surface to your report. You can have as many surfaces as you like.

  • Give your surface a name and tap the icon to take a photo or select a picture from your photo library. 
  • You could use a photo of a floor plan.
  • The selected image will become the background of your surface map.
Screenshot Create a Surface
screenshot Select Your Moisture Map

Start working with your Moisture Map

You are all setup and ready to start adding readings with your meter.

  • Switch on your Tramex meter and ensure that Bluetooth is enabled.
  • Select the Moisture Map you have created.

Choose Your Device

  • Tap 'Devices' at the bottom of the map
  • Your Tramex Bluetooth devices will appear.
  • Select your meter from the list.
Screenshot Choose Your Device
Screenshot Saving Readings

Saving Readings

  • Choose the cell you want to start with on your grid.
  • Take your measurement and tap on your device reading to save.
  • To fill up the grid, select the cells by tapping them or swipe on your device reading. The cell selection moves in the direction that you swipe.

Grid and Colour adjustment

  • If you need more detail in particular areas because you’ve found moisture, you can adjust the grid density at any time. Click the slider button in the top left corner, adjust the grid with the slider and enter more readings.
  • When you’ve entered your readings, you may like to highlight the lowest and/or highest readings in the grid, by modifying the ’grid colour adjustment thresholds’. This acts like a traffic light system, so that the readings are easier to interpret.
  • The grid can be made full screen by clicking the enlarge button in the top right corner.
Screenshot Grid Colour Adjustment
Exporting your Data

Exporting your Data

  • When your surface reading is complete, you can export it as an image or a list of readings (CSV or Excel file)  by tapping one of the export buttons.
  • As this is the Tramex cloud system, you can open this surface report in your browser on any device, laptop or tablet.